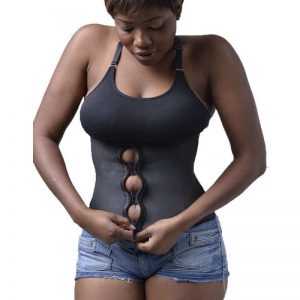
Do you dream of a trimmer waistline with smoother curves? A waist trainer is one tool many people reach for, but it helps to understand what it can and cannot do before you start.
A waist trainer is more than a piece of fabric you slip on. Worn correctly, it may help you feel more supported and shaped while you have it on. It is not a shortcut to permanent weight or fat loss, though, so the tips below focus on getting the most from it safely and realistically.
Follow these basics and you give yourself the best chance of comfortable, sustainable results.
Ten Things to Know Before You Use a Waist Trainer
1. Choose the Right Size First
The main purpose of a waist trainer is to shape and support your midsection while you wear it. To get a good result, choose a trainer that fits your body well. An accurate fit is only possible when you measure your waist and belly precisely.
- Start your measurement right under the bra, keeping the tape parallel to the floor.
- Next, measure across the area that supports you when sitting, at or just below the hip bone.
- Finally, measure your torso length.
2. Measure Your Waist and Belly Size

Just as the right outfit makes a difference to your look, the right-sized trainer makes a difference to your comfort and results. A trainer that is too tight or too loose simply will not be effective. Keep the following points in mind to find your correct size.
3. Know the Difference Between Your Clothing Size and Trainer Size
There is a big difference between your everyday clothing size and your waist trainer size. Regular clothes are designed mainly to cover your body, so the fit can be flexible. A trainer needs a more precise fit, neither too tight nor too loose. As a general guide, many people choose a trainer one to two sizes larger than their usual clothing size.
4. How to Put On a Waist Trainer
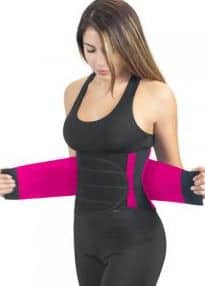
Putting on a trainer looks easy, but doing it correctly takes a little practice. Most trainers come with triple rows of hooks and closure eyes. When you put yours on for the first time, keep these points in mind:
- Don’t wear it over your clothes. It works partly by encouraging sweat and perspiration, so wear it under your regular clothing.
- Start buckling from the first row, or whichever row is the least tight.
- Position the lower edge of the trainer just above your midsection, with the buckles or hooks on the right side of your body.
- Fasten the bottom hook first. The trainer has some natural stretch, so don’t worry about getting the position perfect right away.
- Work your way upward, adjusting the position as you go.
Once all the buckles are fastened, you are ready to go. It can feel awkward at first, but adjusting the fit becomes easier the more you wear it.
5. Does It Hurt at the Beginning?
When you first start wearing a waist trainer, expect an adjustment period. The garment compresses your midsection, and the materials are firmer than regular clothing, so it will feel different from your usual attire.
It should not cause wounds or injuries, but a snug, compressed feeling is normal during the first few uses. Once you get used to it, this usually stops bothering you. If you sweat a lot or have sensitive skin, you may notice a skin rash on the first wear. Some users also report needing the toilet more often, and a few have experienced constipation. If you feel sharp pain, difficulty breathing, or any persistent discomfort, take the trainer off and stop using it.
[Read more about Waist Trainer]
6. How to Bend With a Waist Trainer
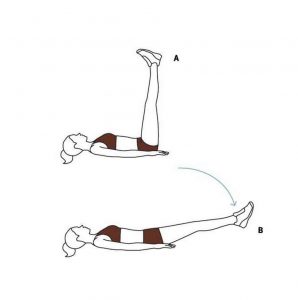
Once you are wearing a waist trainer, bending feels different because your abdominal area is held firmly in place. Some people even find it hard to turn at first.
To stay comfortable, learn to move at the right angles. You will usually find it easier to bend sideways than to lean forward. Don’t force yourself to bend forward, as doing so can damage the trainer and put unnecessary strain on your body.
7. When Is It Time to Get a Smaller Size?
One sign of progress is a reduction in your corset size. After you have been wearing your trainer for a while, keep an eye on how the fit changes. A smaller corset size generally means a smaller waist.
A typical trainer has three rows of hooks, each with its own eyes. As your shape changes, you move from the outermost (third) row to the second, and finally to the innermost row. When you can comfortably wear the innermost row for around 8 hours at a time, that is usually a sign it is time to move down to a smaller trainer.
Removing your current trainer is simple: unhook it from top to bottom until it is off. Many written and video guides are available if you want a complete walkthrough of putting one on and taking it off.
8. Waist Trainers and Belly Fat

Most people buy a waist trainer hoping for a slimmer, more defined midsection. Manufacturers often suggest wearing it for many hours during the day, and claim that the more you wear it, the better your results will be.
Here is the honest picture. While you wear the trainer your body temperature rises and you sweat more, so you lose a small amount of water weight. Because we lose some weight when we dehydrate, it can feel as though we are losing fat, but that is a misconception.
What you are actually losing is water, which returns as soon as you rehydrate. Real fat loss comes from eating fewer calories than you burn. A waist trainer may help support your goals as part of a healthy diet and regular exercise, but it does not burn or eliminate fat on its own.
9. Consistent, Long-Term Use
To get the most from any tool, you need to use it consistently. Many enthusiasts recommend wearing a waist trainer regularly if you want to see a difference in how your waistline looks.
Be realistic, though: the shaping effect of a waist trainer is temporary. Unless you are wearing it, your natural shape will return once you take it off. Decide on a routine you can stick to comfortably and safely, rather than over-wearing it.
10. Give Yourself About a Week to Adjust
As the saying goes, “Rome wasn’t built in a day.” It is best to ease into waist training over about a week, increasing the time gradually so your body can adapt.
- Day 1: Wear your waist trainer for about 2 hours.
- Day 2: Aim for two to three hours, paired with some light, assisted workouts.
- Day 3: Target 3 to 4 hours, which you can split into two sessions, and keep up your exercise.
- Day 4: Increase to 4-5 hours and add some core-strength exercises.
- Day 5: Work up to about 6 hours.
- Day 6: Hold your previous routine and try to reach about 7 hours.
- Day 7: Aim for around 8 hours. Over time, some people build up to 8 to 12 hours a day, but listen to your body and don’t push past what feels comfortable.
Long daily wear isn’t right for everyone, so build up slowly and ease off if anything feels wrong.
Conclusion
It is worth repeating: a waist trainer does not burn body fat on its own. When you wear a corset or waist trainer, it compresses your midsection, including your stomach, which can leave you feeling full sooner and less inclined to eat. Eating less means fewer calories, and a sustained calorie deficit can support fat loss over time.
So any slimming you notice usually comes from a reduced appetite and temporary water loss, not from the trainer melting fat away. Used sensibly alongside a balanced diet and regular exercise, a waist trainer can be a helpful part of your routine, just keep your expectations realistic.
Because waist training can affect your breathing, digestion, and core, it is a good idea to check with a qualified doctor or other health professional before you start, especially if you have any existing health conditions.